A slope that loses six inches of topsoil every time it rains is not a landscaping problem you can fix with mulch and good intentions. It’s a grading problem, and grading problems get worse every year until something structural stops the movement. Retaining walls solve that, but only if they’re built for the actual soil and water conditions on your property, not just stacked up to look nice on a Saturday afternoon.

When You Actually Need One

Not every slope needs a wall. A gentle grade with established grass or ground cover can often be stabilized with terracing, erosion mats, or deep-rooted plantings. Walls become necessary when the math of the slope stops working.

  • The grade drops more than one foot for every three feet of horizontal distance (a slope steeper than 3:1).
  • You’re seeing visible soil erosion, exposed roots, or small landslides after heavy rain.
  • The slope sits within 10 feet of a foundation, driveway, septic system, or property line and any shifting would cause real damage.
  • You want usable flat space, a patio, garden bed, or parking pad, cut into a hillside.
  • Previous attempts at a wall (railroad ties, loose stacked stone) are bowing, leaning, or cracking.

If any of those apply, get a soil and drainage assessment before you pick a material. A wall over 4 feet tall almost always needs an engineer’s stamp and a permit in most jurisdictions, and plenty of inspectors want permits on anything over 3 feet once you factor in surcharge load from a driveway or structure above it.

Material Options and What They’re Actually Good For

Every material has a real tradeoff between upfront cost, lifespan, and what it looks like twenty years from now. Here’s how the common options stack up.

  • Segmental concrete block (SRW): Interlocking blocks like Keystone or Versa-Lok. No mortar needed, handles curves well, DIY-friendly up to about 3 feet. Lifespan 50+ years. This is the workhorse choice for most residential walls under 6 feet.
  • Poured concrete: Strongest option for tall or heavily loaded walls, smooth or textured finish, requires forms and often rebar. Best for walls holding back driveways or supporting structures above. Lifespan 75-100 years with proper reinforcement.
  • Natural stone (dry-stacked or mortared): Fieldstone or quarried block, the most expensive per square foot but the best resale appeal and the only option that improves with age visually. Dry-stacked requires serious skill to get the batter angle right.
  • Timber: Pressure-treated landscape timbers or railroad ties. Cheapest upfront, but rot sets in within 15-20 years even with treated wood, and ties are increasingly hard to source due to creosote restrictions. Fine for low garden walls under 2 feet, not recommended for anything load-bearing.
  • Gabion walls: Wire cages filled with stone. Excellent drainage built in, industrial look that some homeowners love and others hate, works well on steep sites where drainage is the main concern.
  • Poured concrete with a stone or brick veneer: Gets you the structural strength of concrete with a finished look, at a cost premium over plain block.

Drainage: The Part That Determines Whether the Wall Survives

Most retaining wall failures are not material failures. They’re water failures. Soil weighs around 100-120 pounds per cubic foot dry. Saturate that same soil with water and the weight and lateral pressure behind the wall can nearly double. A wall engineered to hold back dry soil will bulge, crack, or collapse outright if water is allowed to build up behind it with nowhere to go.

A properly built wall needs three drainage components working together, not just a few weep holes drilled through the face.

  • Gravel backfill: Clean, crushed stone (typically 3/4 inch, no fines) placed directly behind the wall, usually 12 inches wide minimum, extending the full height.
  • Perforated drain pipe: A 4-inch perforated pipe laid at the base of the gravel backfill, sloped to daylight or tied into a storm drain, so water has an actual exit instead of just pooling at the footing.
  • Filter fabric: Geotextile fabric wrapped around the gravel to keep fine soil particles from migrating in and clogging the drainage system over time.

Skip any one of these and you’re building a wall with a built-in expiration date. This is also where most budget “wall guys” cut corners, because gravel, pipe, and fabric add cost and labor that don’t show once the wall is finished and looks fine for the first year or two. Problems usually show up in year three to five, after a few wet winters.

Realistic Cost Ranges

Prices vary by region, soil conditions, wall height, and access for equipment, but these ranges reflect typical installed costs including excavation, base prep, and drainage, not just materials.

  • Timber: $15-$25 per square foot. Cheapest, shortest lifespan.
  • Segmental concrete block: $25-$45 per square foot. The most common mid-range choice.
  • Poured concrete: $30-$55 per square foot, more with rebar and engineering for tall walls.
  • Gabion: $20-$35 per square foot, materials are cheap but labor to fill cages properly adds up.
  • Natural stone: $40-$80+ per square foot depending on stone type and whether it’s mortared or dry-stacked.

A typical 30-foot-long, 4-foot-tall segmental block wall (120 square feet of face) lands somewhere between $3,500 and $7,000 installed, assuming normal access and no major drainage complications. Add a permit and engineering review for anything approaching or exceeding 4 feet, and budget another $500-$1,500 for that paperwork and stamped drawings. Steep sites with poor truck access, heavy clay soil, or the need to relocate utilities can push any of these numbers up by 20-40%.

Questions to Ask Before You Hire Anyone

A low bid on a retaining wall is often low because the drainage system got quietly left out of the scope. Before signing a contract, get specific answers in writing.

  • What is the base depth and composition, and is it compacted in lifts or just dumped and leveled?
  • What drainage system is included, and is perforated pipe part of the bid or an add-on?
  • Does the wall need engineering, and if so, is that cost already in the quote?
  • What is the warranty on workmanship versus the manufacturer warranty on the blocks or materials?
  • Has the contractor pulled the required permit, or is that left to the homeowner?

If you’re in the South Puget Sound area, clay-heavy soils and our wet winters make corner-cutting on drainage particularly risky, and getting quotes from established retaining wall builders in Tacoma who can show you completed projects at least three or four years old is a far better test than photos of a wall that’s only a few months in the ground.

Next Step

Walk your property after the next heavy rain and watch where water actually moves, not where you assume it moves. Photograph standing water, erosion channels, and any existing wall that’s already showing a lean or a crack. Bring those photos to at least two contractors for in-person quotes, and ask each one to walk you through their drainage plan line by line before you compare price. The wall that costs 15% more with real drainage behind it will outlast two cheaper walls put together.

Related articles: Retaining Walls: When You Need One, What to Build It With, and What It Actually Costs · Repairing or Installing a Sub Floor – Tips for Sub Flooring Repair · Tracing a Ceiling Water Stain to Its Source and Repairing It for Good
Signs Your Yard Needs a Retaining Wall

A slope that loses two inches of topsoil after every heavy rain is telling you something concrete needs to happen. Retaining walls solve a specific problem: they hold back soil that would otherwise slide, erode, or slump under its own weight. If you have a grade change of more than a foot over a short run, standing water pooling against your foundation, or a slope steep enough that mowing it feels like a safety risk, that’s a strong case for a wall rather than more mulch and hope.

Other common triggers include a driveway or patio that’s starting to crack because the soil beneath it is shifting, a neighbor’s yard sitting higher than yours and dumping runoff onto your property, or a desire to carve flat, usable space out of a sloped backyard for a patio, garden beds, or a play area. Walls under two feet are often a straightforward landscaping project. Anything taller starts involving soil pressure calculations, drainage systems, and local permitting that changes the entire scope of the job.

Material Options and What They Actually Cost

Segmental retaining wall block, often called SRW or modular block, is the most common choice for residential projects. It’s interlocking, doesn’t require mortar, and installs relatively fast. Installed cost typically runs $15 to $30 per square foot of wall face, depending on block style and site access.

Poured concrete walls cost more, usually $25 to $45 per square foot installed, but they handle taller heights and heavier loads better than block. Natural stone, whether dry-stacked or mortared, is the most expensive common option at $40 to $75 per square foot, largely because of labor and the skill required to fit irregular stone tightly.

Timber walls using pressure-treated lumber run cheaper, around $20 to $35 per square foot, but they have a shorter lifespan, typically 15 to 20 years before rot sets in, compared to 50-plus years for concrete or stone. Gabion walls, which use wire cages filled with rock, fall in the $20 to $35 per square foot range and work well on properties where drainage is a major concern or where a more industrial look fits the setting.

  • Segmental block: $15-$30/sq ft, 40-60 year lifespan
  • Poured concrete: $25-$45/sq ft, 50+ year lifespan
  • Natural stone: $40-$75/sq ft, 75+ year lifespan
  • Pressure-treated timber: $20-$35/sq ft, 15-20 year lifespan
  • Gabion: $20-$35/sq ft, 50+ year lifespan

Drainage Is the Part Most People Skip

Most retaining wall failures trace back to water, not weak materials. Soil behind a wall holds moisture, and when that water has nowhere to go, it builds hydrostatic pressure that pushes the wall forward until it leans, bulges, or collapses outright. A wall built without drainage can fail within two or three years even if every block was installed correctly.

Proper drainage starts with backfilling behind the wall using clean crushed stone, not the native soil that was dug out, for at least 12 inches of depth behind the wall face. A perforated drain pipe should run along the base of that gravel backfill, sloped slightly so water flows toward a daylight outlet or a connection to your storm drain system. Filter fabric placed between the gravel and the surrounding soil keeps fine particles from clogging the drain over time. Mortared stone or poured concrete walls also need weep holes spaced every four to six feet to let trapped water escape instead of building pressure behind the wall.

Skipping any of these steps to save money is one of the most expensive mistakes a homeowner can make, since fixing a failed wall usually costs more than building it correctly the first time.

Realistic Cost Ranges by Wall Height

Total project cost depends on height, length, material, and site access, but rough benchmarks help with budgeting. A 2-foot-tall wall running 20 linear feet in SRW block typically costs $3,500 to $7,000 installed, including basic drainage. A 4-foot wall of the same length jumps to $9,000 to $18,000 once you add the gravel backfill volume, drainage pipe, and often an engineered design, since many jurisdictions require engineering above that height.

A 6-foot wall, which almost always requires an engineer’s stamp and sometimes tiebacks or geogrid reinforcement extending back into the slope, can run $15,000 to $30,000 or more for the same 20-foot run. Natural stone or poured concrete at that height pushes costs toward the higher end of those ranges or beyond. Site access matters too: a wall built where equipment can drive right up costs noticeably less than one requiring hand-carried materials through a gate or down a narrow side yard.

Permits, Engineering, and When to Call a Pro

Most cities and counties require a building permit for retaining walls taller than 3 or 4 feet measured from the bottom of the footing to the top of the wall, and some require permits for any wall near a property line or structure regardless of height. Engineering review for taller walls typically adds $500 to $1,500 to the project but accounts for soil type, slope load, surcharge from nearby structures or driveways, and seismic considerations in areas prone to earthquakes.

A wall under 2 feet with no structural load above it is often reasonable for an experienced DIYer to tackle. Anything taller, anything supporting a driveway or patio above it, or any wall near a property line or foundation should go to a licensed contractor who pulls permits and coordinates with an engineer when required. If you’re in the South Sound area, getting quotes from retaining wall builders in Tacoma who handle the structural work and the drainage system as one coordinated job is worth the extra step, since separating those two pieces between different crews is how walls end up built without proper backfill in the first place.

What to Do Next

Walk your property after the next hard rain and note where water pools, where soil has visibly shifted, and where slopes are steep enough to cause erosion. Take a few photos and rough measurements of height and length for any problem areas. With that information in hand, get at least two itemized quotes from local contractors that break out materials, drainage components, and labor separately, so you can compare what’s actually included rather than just a bottom-line number.

Related articles: Repairing or Installing a Sub Floor – Tips for Sub Flooring Repair · Tracing a Ceiling Water Stain to Its Source and Repairing It for Good · A Seasonal Home Maintenance Checklist That Prevents Expensive Repairs

Water and fire damage in a Capital Region home almost always starts with a decision made in the first hour, and it is usually the wrong one: mop up the water, run a fan, throw out the ruined carpet, and call the insurance company later. That instinct costs homeowners money. Albany’s housing stock is old (a lot of it built between 1900 and 1950 in neighborhoods like Pine Hills, Delaware Avenue, and downtown Troy and Schenectady), and older plumbing, knob-and-tube wiring remnants, and plaster walls all react differently to water and fire than modern construction. Before you clean anything up, you need a plan that protects your claim as much as your house.

Document Everything Before Cleanup Starts

Photograph and video every affected room from multiple angles before you move a single item. Get close-up shots of water lines on walls, charred framing, soaked insulation, and damaged flooring. Include wide shots that show the room in context, not just the damage itself. If a pipe burst in a second-floor bathroom in a Colonie split-level and soaked the kitchen ceiling below, document both floors and the path the water traveled.

Keep receipts for anything you buy for emergency mitigation, such as a wet/dry vac rental, a dehumidifier, or a tarp for a fire-damaged roof. New York insurers generally reimburse reasonable emergency mitigation costs under the policy’s “duty to mitigate” clause, but only if you can show what you spent and why.

  • Do not throw away damaged materials until the adjuster has seen them or given written authorization to dispose of them.
  • Write down the date and time damage was discovered, and the date you reported it to your carrier.
  • Get the adjuster’s name, direct phone number, and claim number in writing before the first site visit.

If mold risk is a concern, the IICRC S500 standard generally treats 24 to 48 hours of standing water as the window before microbial growth becomes likely. You can start air movement and dehumidification within that window without waiting on the adjuster, but photograph first and keep the damaged materials on site if space allows.

Get a Contractor Involved Before the Scope Is Finalized

Most homeowners wait until after the adjuster writes an estimate to call a contractor. That order of operations works against you. Adjusters, even good ones handling forty or fifty claims at a time across the Capital Region, do not always catch every layer of damage, especially with fire claims involving smoke penetration into HVAC ductwork or water claims where moisture traveled behind a shared wall into a neighboring room.

A contractor who walks the property with you before or during the adjuster’s visit can point out damage the adjuster’s initial walkthrough might miss, such as subfloor delamination under vinyl plank flooring, or insulation in a Latham or Guilderland attic that got wet from a roof fire and lost its R-value even though the drywall below looks fine. Contractors who regularly work claims in Albany, Rensselaer, and Saratoga counties know how local adjusters typically scope jobs and where gaps tend to show up.

Ask the contractor to prepare a written scope of repair, ideally using the same Xactimate line-item format most adjusters use. When your contractor’s estimate and the adjuster’s estimate speak the same language, discrepancies get resolved in days instead of weeks of phone tag.

Know the Difference Between ACV and RCV

Most homeowner policies in New York pay claims one of two ways, and the difference determines how much cash actually lands in your account before repairs are done.

  • Actual Cash Value (ACV) pays replacement cost minus depreciation. A 22-year-old asphalt shingle roof rated for 25 years might be depreciated 80 to 90 percent, meaning the initial check could cover only a fraction of what a new roof costs.
  • Replacement Cost Value (RCV) pays the full cost to replace the damaged item with new material of similar kind and quality, with no deduction for age or wear.

Many RCV policies still pay in two steps: an initial ACV payment, then a second “recoverable depreciation” payment released once the contractor completes the work and submits a final invoice. If your policy works this way, tell your contractor up front, because the payment structure affects the draw schedule and when the final balance is due.

Compare your contractor’s total repair estimate line by line against the insurer’s estimate. If the adjuster’s number is based on ACV and your policy actually includes RCV coverage, that gap is often the single biggest source of underpayment on a claim. This is one of the main reasons homeowners search for an insurance contractor albany ny can trust to review both documents side by side before signing off on any settlement.

Watch for Storm Chasers

After a hard freeze-thaw cycle or a heavy spring storm rolls through the Capital Region, out-of-town crews start knocking on doors in neighborhoods with visible roof damage. They often drive trucks with out-of-state plates, offer a “free inspection,” and push homeowners to sign a contract or an assignment of benefits form on the spot, sometimes before the insurance company has even been called.

Signing an assignment of benefits hands your claim rights to the contractor, who then deals directly with your insurer on your behalf, often with little transparency about what gets billed or approved. If a crew shows up unannounced, asks for a large upfront deposit in cash, or pressures you to sign anything before you’ve called your agent, treat that as a reason to say no, not a reason to hurry.

  • Verify any contractor’s home improvement license through the Albany County Consumer Affairs office or the relevant county clerk, since New York requires home improvement contractor registration in many counties outside New York City.
  • Check for a permanent local address and a business history that predates the storm by years, not weeks.
  • Call two or three references from jobs completed at least a year earlier, not just recent ones.

Hire a Local Contractor With Adjuster Experience

An established Capital Region contractor who handles insurance claims regularly brings something a general handyman or an out-of-town crew cannot: a working relationship with how local adjusters, and often the same regional carriers, operate. They know which documentation formats speed up approval, how to write a supplement request when hidden damage turns up mid-project, and how long a typical claim takes to move from first estimate to final payment in this market, usually four to eight weeks for a mid-size water or fire loss depending on the carrier.

Ask any contractor you’re considering how many insurance claims they’ve hand

Related articles: Retaining Walls: What They Cost, What They’re Made Of, and Why Drainage Decides Everything · Retaining Walls: When You Need One, What to Build It With, and What It Actually Costs · Repairing or Installing a Sub Floor – Tips for Sub Flooring Repair

A cracked bead of driveway sealant costs about $40 to fix in October. Left alone, water gets underneath, freezes in January, and turns into a $3,000 to $5,000 concrete replacement job by spring. That pattern repeats across almost every system in a house: small, cheap fixes now versus large, unavoidable ones later. The checklist below breaks maintenance into four seasons because most home damage follows weather, not the calendar on your phone.

Spring: Water Management and Winter Damage Check

Spring is when you find out what winter did to your house. Water is the single most expensive thing to ignore, so start there.

  • Walk the roofline with binoculars and look for missing, curled, or cracked shingles. A single missing shingle left through one rainy season can lead to $1,500+ in attic insulation and drywall repair.
  • Clean gutters and downspouts, then run a hose through them to confirm water exits at least 3 feet from the foundation. Clogged gutters are a leading cause of basement seepage.
  • Check the foundation for new cracks wider than 1/8 inch or any that have grown since last year. Photograph them with a ruler in frame so you can track changes.
  • Inspect exterior caulking around windows and doors. Recaulking now costs under $20 in materials; replacing a rotted window sill runs $300 to $600 per window.
  • Test the sump pump by pouring a bucket of water into the pit. If it doesn’t kick on, replace it before storm season, not during it.

Summer: HVAC, Exterior, and Irrigation

Summer heat stresses cooling systems and exterior surfaces. This is also the easiest season to get contractors scheduled before fall backlogs hit.

  • Replace HVAC air filters every 60 to 90 days, more often if you have pets. A clogged filter forces the compressor to work harder and can shorten its life by years; a new unit runs $4,000 to $8,000.
  • Schedule a professional AC tune-up (typically $100 to $200) to check refrigerant levels and clean the condenser coils. Catching a slow refrigerant leak early avoids a burned-out compressor.
  • Inspect exterior paint and siding for peeling or bubbling, particularly on the south and west-facing walls. Repainting now protects the wood underneath; ignoring it invites rot that requires siding replacement.
  • Check outdoor faucets and irrigation lines for leaks. A slow drip at an outdoor spigot can waste thousands of gallons and, if it runs near the foundation, soften soil enough to cause settling.
  • Trim tree branches that hang within 10 feet of the roof. Overhanging limbs scrape shingles, dump extra leaf debris in gutters, and give squirrels a bridge into the attic.

Fall: Sealing the House Before the Freeze

Fall maintenance is about locking in warmth and locking out water before temperatures drop below freezing.

  • Have the furnace inspected and serviced before the first cold snap. A cracked heat exchanger caught in October is a repair; caught in January during a cold week, it’s an emergency replacement at emergency rates.
  • Drain and disconnect garden hoses, then shut off interior valves to exterior spigots if your house has them. A frozen and burst outdoor faucet can flood a basement wall cavity before anyone notices.
  • Seal gaps around pipes, vents, and cable lines entering the house with expanding foam or caulk. These gaps are also the main entry points for mice looking for a winter home.
  • Clean gutters again after leaves drop. Fall leaf load is usually heavier than spring debris and ice dams form fastest where gutters are already full.
  • Check attic insulation depth. Most homes need 12 to 15 inches of blown insulation; anything less lets heat escape and melts roof snow unevenly, which causes ice dams.
  • Test smoke and carbon monoxide detectors and replace batteries. Furnace and fireplace use both spike in fall and winter, raising CO risk.

Winter: Watch and Respond

Winter is less about new projects and more about monitoring the systems you’ve already prepped, since extreme cold exposes any weak point immediately.

  • Keep interior temperatures above 55°F even when away, and open cabinet doors under sinks on exterior walls during cold snaps to let warm air reach pipes.
  • Watch for ice dams along the roof edge. A dam that’s more than 2 inches thick usually means heat is escaping from the attic and needs to be addressed with insulation, not just chipped away.
  • Check the water heater for rust or moisture pooling at the base. Units typically last 8 to 12 years; a slow leak in winter can freeze around the base and crack the tank.
  • After heavy snow, clear it from around HVAC condenser units and dryer vents so airflow isn’t blocked.
  • Reset the humidifier settings if your furnace has one. Indoor air that’s too dry cracks wood trim and flooring; too humid and you get condensation on windows that rots the frames.

Building a System That Actually Gets Used

A checklist only prevents repairs if someone follows it. Put the four seasonal lists into a shared calendar with reminders set two weeks before the season actually changes in your region, not on the calendar date. Keep a simple log, even a notes app entry, recording what was checked, what was found, and photos of anything questionable like foundation cracks or roof wear. This turns a one-time inspection into a record you can compare year over year, which is exactly what catches a slow-developing problem before it becomes a $10,000 one.

Start by picking one task from whichever season is closest on the calendar and scheduling it this week, whether that’s calling an HVAC technician or buying gutter guards. The house doesn’t wait for a convenient time to develop a leak, and neither should the maintenance that prevents one.

Related articles: Working With an Insurance Contractor After Water or Fire Damage in Albany · Retaining Walls: What They Cost, What They’re Made Of, and Why Drainage Decides Everything · Retaining Walls: When You Need One, What to Build It With, and What It Actually Costs

A brown ring on your ceiling means water traveled through building materials before it ever reached your eyes, which is why the stain is almost never directly below the actual leak. Water follows joists, insulation, and pipe runs, sometimes moving four or five feet horizontally before it drips onto drywall. Finding the real source takes some detective work, but it’s a process any homeowner can follow with a flashlight, a ladder, and about an hour of patience.

Why the Stain’s Location Rarely Matches the Leak’s Location

Water is lazy. It takes the path of least resistance, running along the top of drywall, following a truss, or pooling in a low spot in the insulation before finally soaking through. A leak near a chimney flashing can show up as a stain 6 feet away, on the far side of the room. This is the number one reason people patch a ceiling, repaint it, and watch the same stain return three months later. They fixed the visible symptom without tracing it back to the actual entry point.

Before you touch anything, look at the shape of the stain. A stain with concentric rings, like a target, usually means repeated small leaks that dried between events, common with condensation or a slow roof leak. A single large, dark blotch with a soft or sagging center suggests an active or recent leak with significant water volume, and that ceiling may need to be opened up regardless of what you find.

Start in the Attic, Not on the Roof

If you have attic access, go up there with a bright flashlight before you climb on the roof. Roof inspections from the ground or ladder are useful, but the attic tells you what’s actually happening at the framing level. Look for:

  • Dark streaks or mold on the underside of the roof deck or on rafters
  • Insulation that’s compressed, discolored, or damp to the touch
  • Rust or white mineral trails on nail shanks poking through the roof deck (a classic sign of condensation, not a leak)
  • Daylight visible through the roof deck, especially around vents, chimneys, or skylights

Pay close attention to any point where something penetrates the roof: plumbing vent stacks, chimneys, skylights, bathroom exhaust fans, and roof-mounted AC lines. Flashing around these penetrations fails far more often than the roof shingles themselves. A 2-inch plumbing vent boot, for example, typically has a rubber gasket that cracks and dries out after 8 to 10 years, and it’s one of the most common sources of a “mystery” ceiling stain in a hallway or bathroom below.

If you can’t get into the attic, note the stain’s position relative to exterior walls and roof features, then check those same areas from outside with binoculars before climbing up.

Rule Out Plumbing, HVAC, and Condensation

Not every ceiling stain comes from the roof. If the stain is directly under a bathroom, kitchen, or laundry room on the floor above, suspect plumbing before roofing. Common culprits include:

  • A wax ring under a toilet that has failed, allowing water to seep out with each flush
  • A supply line or drain fitting under a sink that drips only when the fixture is used
  • A bathtub or shower with cracked grout or a failed caulk seal at the base, letting water run behind the tile
  • An HVAC condensate line that’s clogged or disconnected, common near air handlers in a second-floor closet
  • A window AC unit or ductwork running through the attic that sweats in humid weather

A simple test: run the suspected fixture (flush the toilet several times, run the shower for 10 minutes, run the AC on a humid day) while someone watches the ceiling below with a flashlight. If the stain darkens or a new drip appears within 20 to 30 minutes, you’ve found your source without opening a single wall.

Confirm Whether the Leak Is Active or Resolved

Press gently on the stained area with your fingertips. If it feels soft, spongy, or gives at all, there is likely still moisture in the drywall or the paper facing has separated, and the material needs to be cut out rather than just painted over. A moisture meter (available for $20 to $40 at most hardware stores) takes the guesswork out of this step. Readings above 20% on a pin-style meter indicate wet material that needs to dry out or be replaced before any cosmetic repair.

Old stains from a leak that’s already been fixed (say, from a previous owner’s roof repair) will feel firm and dry, and the moisture meter will read close to the level of the surrounding ceiling. In that case, you’re only dealing with a cosmetic repair, not a structural one.

Repairing the Ceiling the Right Way

Once the source is fixed, whether that meant replacing a boot flashing, resealing a wax ring, or clearing a condensate drain, give the area at least 48 to 72 hours to dry completely before starting cosmetic work. Cutting into drywall that’s still wet just creates a bigger repair.

For a stain with no soft spots, a stain-blocking primer is essential. Regular ceiling paint will not stop a water stain from bleeding through, even after two or three coats. Use a shellac-based primer (such as BIN) or an oil-based stain blocker, apply one coat, let it dry fully (usually 45 minutes for shellac-based products), then repaint with matching ceiling paint.

For sagging, soft, or crumbling drywall, cut out the damaged section back to solid material, using the nearest joists as your cut lines so the new piece has something to screw into. Replace with drywall of matching thickness (most ceilings are 1/2 inch, some are 5/8 inch for fire rating), tape the seams with paper tape and joint compound in three thin coats, sand between coats, then prime with a stain blocker before painting.

If the attic inspection and fixture tests don’t turn up an obvious source, or if the stain keeps reappearing after a repair, it’s worth having a roofing contractor do a water test on the roof (running a hose over specific sections while someone watches the attic from below) rather than guessing again. That test costs far less than a second round of drywall repair.

Related articles: A Seasonal Home Maintenance Checklist That Prevents Expensive Repairs · Working With an Insurance Contractor After Water or Fire Damage in Albany · Retaining Walls: What They Cost, What They’re Made Of, and Why Drainage Decides Everything

Repairing or Installing a Sub Floor – Tips for Sub Flooring Repair

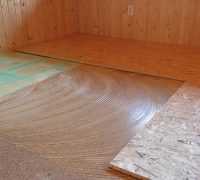
If you’ve has some type of water damage or insect infestation, you may find that you have damaged subflooring in the home. Sub-flooring is just what the term sounds like: material underneath the surface you walk on. It may be concrete, plywood, or several other types of material. Unfortunately, even the most robust subfloor material can become cracked or mildewed. Water can become trapped between the floor and the subfloor or between the top surface and the subfloor. Those and many other types of problems will often require making repairs.

It’s usually expensive and never pleasant but, like dental work, putting it off generally leads to bigger problems before long. Depending on the extent of the problem, it may require anything from removing a few tiles to stripping the entire top floor surface off and beginning anew.

The need for repairs can be detected in several ways, again depending on the nature and extent of the problem. In some cases, it’s an area on the top floor with a visible gap, say in the bathroom where water will certainly leak down. In other cases, it may be just a musty odor from mildew that won’t go away no matter how well the floor is cleaned. Sometimes it appears as a dip or bowled area in a section of carpet, which becomes especially obvious when it’s walked on.

Once confirmed, tackle the problem as soon as possible.

How to go about that will vary with the type of top floor installed. Vinyl, for example, can very rarely be reused and will have to be replaced with new material. With care, some stone tiles can be removed without cracking, then reused. Wood is a borderline case. Laminates can sometimes be reused, but it’s usually not worth the extra effort required to remove them without damage. The carpet will often have to be replaced with a new carpet or another flooring material.

Remove any flooring in the damaged area. Then inspect the damaged sub-floor. The most typical problem is water that has rotted plywood. Though never easy, there are worse things to have to repair. Cut away the rotted plywood, removing an entire sheet if possible. If not, simply cut a large enough area around the damage to ensure that all the rot has been cleared out. Mildew is made of living organisms and they can spread. Termite or other insect-induced damage will require an exterminator. If not stopped, they’ll continue to do more damage.

There’s one potential upside to an incident of a damaged subfloor. It creates the opportunity to reevaluate the type of flooring desired. A plywood sub-floor covered with carpet can be re-fitted with finished concrete or a laminate, for example.

Even if the same type of sub-flooring and flooring is laid down as a replacement, it’s a chance to use improved materials for the repair project. Wood sub-floors are much better than their predecessors from 20-50 years ago, thanks to improved treatments that will reduce the odds of ever having to do the work again. Carpets today have better water-resistant chemicals embedded in the fibers than in decades past.

Ensure that the new sub-floor materials, whatever you use, are perfectly flat to support the new floor. They have to be sturdy enough to bear the pressure of intended traffic. Sub-floor repairs are not something anyone wants to have to do twice.

Related articles: Tracing a Ceiling Water Stain to Its Source and Repairing It for Good · A Seasonal Home Maintenance Checklist That Prevents Expensive Repairs · Working With an Insurance Contractor After Water or Fire Damage in Albany